The viral sensation of “ glazed donut” beauty became famous when beauty expert and model Hailey Bieber gave the concept in 2021. Later, the glazed donut nails by LA-based artist Zola Ganzorigt became the hottest nail trend.
So, now it has become trendy, and girls love it. If you have the craze, we bring a solution for you. We will share the DIY ideas to recreate glazed donut nails. Keep reading our step-by-step guide to learn recreation of viral trends at home.
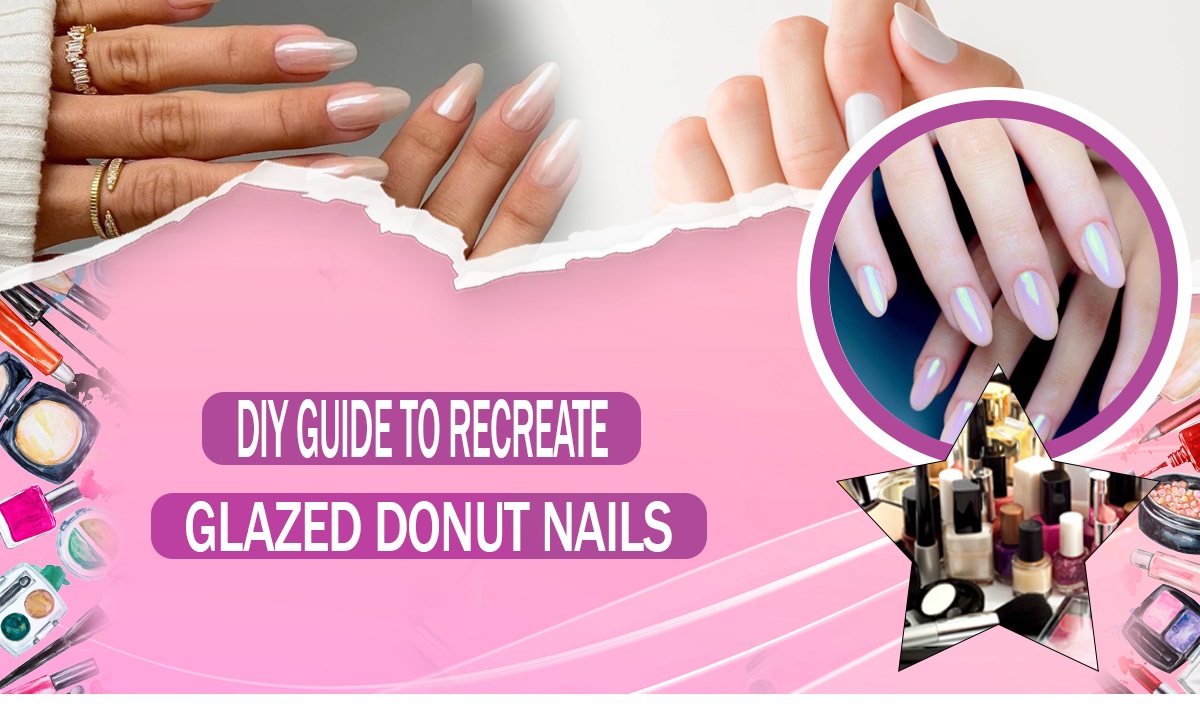
What are Glazed Donut Nails?
Before explaining the step-by-step process to recreate the nails, we will explain glazed donut nails.
They are a sweet nail trend inspired by the glossy finish of a glazed donut. They are smooth, bright, shiny, and attractive. Such nails are recreated using different polishes.
OPI Gel Color polish is used in Funny Bunny and topped with OPI Chrome Effects in Tin Man Can for sparkling effects. Glazed donut nails ensure a neutral Chic look predicted to stick around for a minimalist appeal.
Step-by-Step Guide to Recreate Glazed Donut Nails
Follow the steps below to recreate glazed donut nails at home in a viral trend.
Step 1: Prepare your Nails
Prepping your nails is like getting a canvas ready for a masterpiece. First, remove any old nail polish using an acetone-based remover. Then, trim and shape your nails just how you like them. Before applying polish, wipe your nails with acetone or rubbing alcohol to clean any oils that could mess with the polish. Softening your cuticles with warm water or a cuticle remover makes it easier to gently push them back and trim away extra skin.
A dip in warm water or a cuticle remover can soften those cuticles. Once they’re pliable, use a cuticle pusher to gently nudge them back. Any excess skin can be carefully snipped with a cuticle nipper. This step sets the stage for a clean, smooth canvas for your nail art adventure.
Step 2: Apply the Base Coat
Now, it’s time to apply the base coat. The base coat will work as a shield for your nails. We recommend it because it prevents your nails from staining. It also assists in making your manicure long-lasting.
Apply a thin layer of OPI’s natural nail base coat. Avoid using too thick; otherwise, it may look awkward. Once applied, make sure it becomes dry before applying your favorite color.
Step 3: Apply the White Polish
Creating that dreamy, glazed look begins with a delicate layer of white or pale polish. OPI’s Nail Lacquer in “Funny Bunny” is perfect for achieving that sheer yet creamy appearance. This shade gives the same feel as the gel manicure but in a regular polish form.
Also Read: How To Clean Beauty Blender [ Step By Step Guide ]
For that glazed donut effect, start with a thin coat of white polish. The shade “Funny Bunny” from OPI’s Nail Lacquer range works wonders here. It’s like the regular Polish version of the gel manicure, providing that sheer, creamy vibe.
Step 4: Add the Shimmer
The secret to that shiny, shimmering finish involves mixing a pearlescent polish with a clear top coat. Try OPI’s Nail Lacquer in “Kyoto Pearl.” This pearly white shade gives off the same shiny effect as the original chrome powder and gel combo used by Bieber. Mix it with a clear top coat for that sheer touch. If it’s not sheer enough, blend it with a more clear top coat to lighten the polish.
Achieving that shimmer isn’t a secret anymore! Combine OPI’s “Kyoto Pearl” with a clear top coat for that pearlescent glow. To get the sheer look, mix them well. And if it’s too opaque, just add a more clear top coat until it’s perfect.
Step 5: Seal the Manicure
To lock in the magic, use a chip-resistant top coat. Take the same top coat you used for the “Kyoto Pearl” mix and apply a thin layer to seal the deal. Wipe the brush or use a clean one to ensure a flawless finish.
The final touch? A chip-resistant top coat. Use the same one you used in the “Kyoto Pearl” mix and apply a thin layer to keep your masterpiece intact. Just make sure to clean the brush or use a fresh one for that perfect finish.
Final Thoughts
Recreation glazed donut nails can make you special at every event. With a DIY guide, you can make unique and awesome-looking nails that attract everyone’s attention. But try to follow the above instructions properly. It will prevent you from any untoward experience. Share with us your experience in the comment section below.